Patches' ShiPainterPro Tutorial!
This tutorial assumes you know how to use a basic oekaki applet like ShiPainter andthe usage of layers.you are looking to forward your oekaki skills by moving on to Pro.
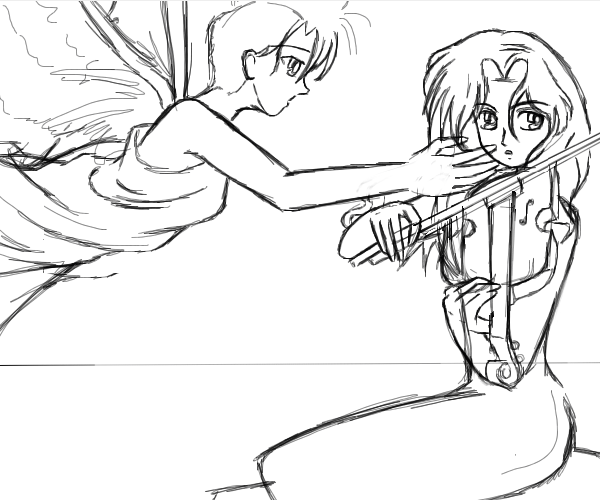
| Step 1 | |
|
Sketch out your drawing on layer 0. I used the Pencil tool for mine but you can use any tool you feel most comfortable with. |
| Step 2 | |
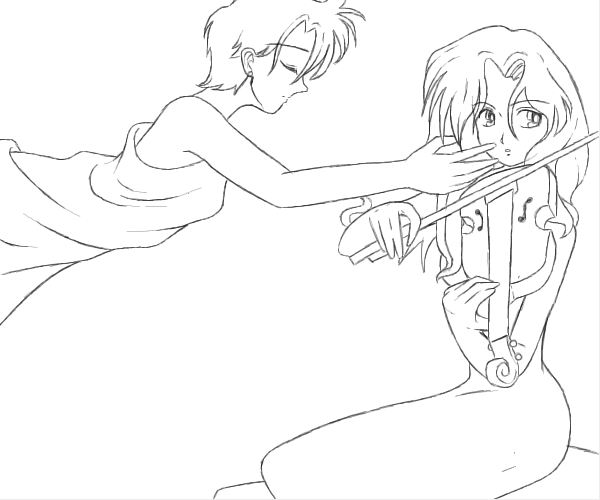 |
Set the opacity of Layer 0 to about 20-50 percent. Then go to layer 1 and draw your lineart. I did this with the Pen Tool on a very very low opacity. This can take ALOT of time, but if you are careful then it will turn out smooth and great! You can then Erase your sketch on Layer 0. |
| Step 3 | |
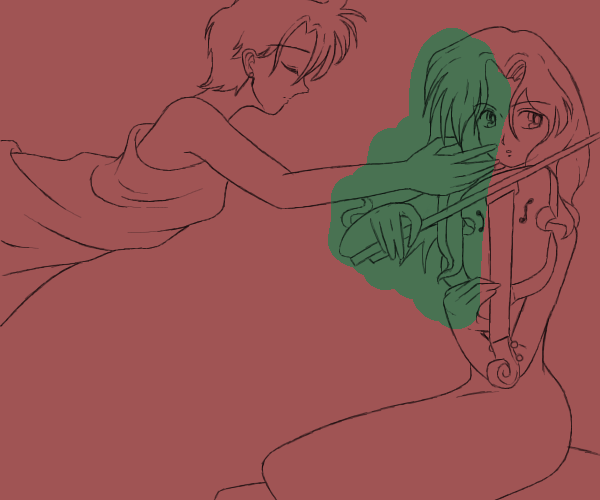 |
On layer 0, lay down the overall color that ou want your BG to be. This wasy you can keep that in mind and incorporate it into the rest of your color scheme. DECIDE WHAT COLORS YOU ARE GOIND TO USE EVERYWHERE BEFORE YOU START COLORING!!!!!!
I cannot stress that enough. Then start maing layers between your bottom layer and your lineart layer and lay in some color whereever you wanna start to color. I started with Michiru's hair. |
| Step 4 | |
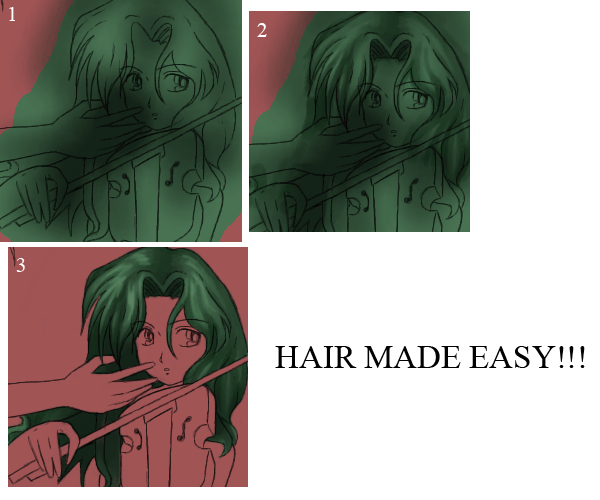 |
Coloring hair this way sint hard in the least, just takes some getting use to. .:On the same layer that you layed down your basic hair color Airbrush in some general shadows and such. Don't be detailed here ^^ 2.Now, Take the WaterColor2 Tool and paint in your details for the shadows and highlights. DO NOT USE THE BURN AND DODGE TOOLS!!! Take the time to actually paint the hair. Don't take the lazy way out! 3.Erase all the unneeded color and viola! You have hair! |
| Step 5 | |
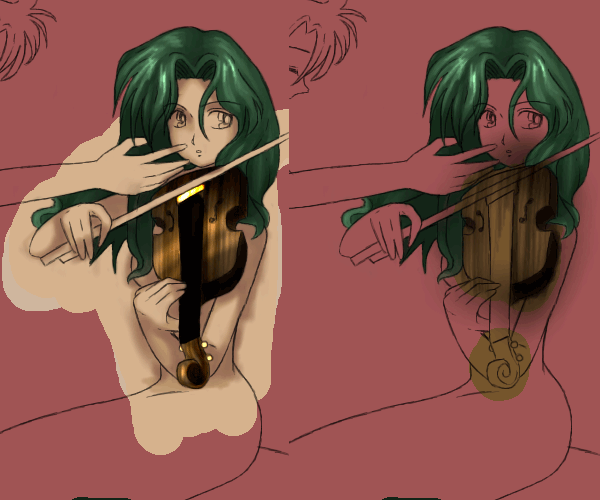 |
Use that same basic principal for everything you color.
When it comes to skintone, I just layed down the basic color, used the Airbrush tool at a high opacity to lay in my shadows cell-shade style then blur the edges just slightly to give it a more realistic atmosphere.
NOTE:Using the burn and Dodge tools can be handy when coloring metal or varnish as finishing touches, lie i did here on the violin. But all the woodgrain and shadows were painted in by manually with a small Airbrush. |
| Step 6 | |
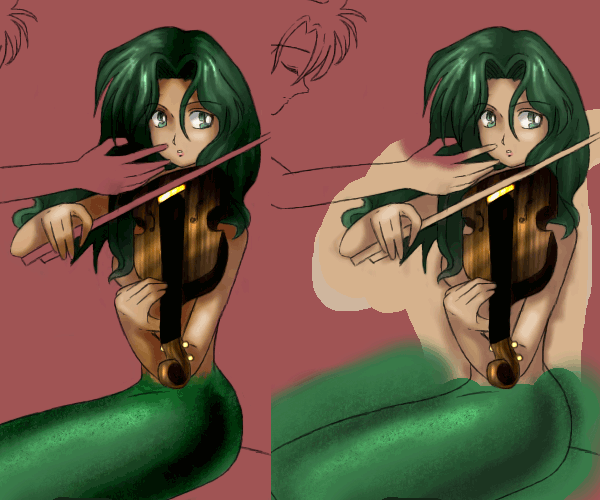 |
The Texture pallete can come in handy when you want effects like scales as I have here. Just don't overruse it! Sometimes the best textures are the ones you raw yourself!
Use can also go back and put a few touches in with the burn and dodge tool. You don't have to, and this is usually only done when you are doing a semi-dark scene or want a photographic look. |
| Step 7 | |
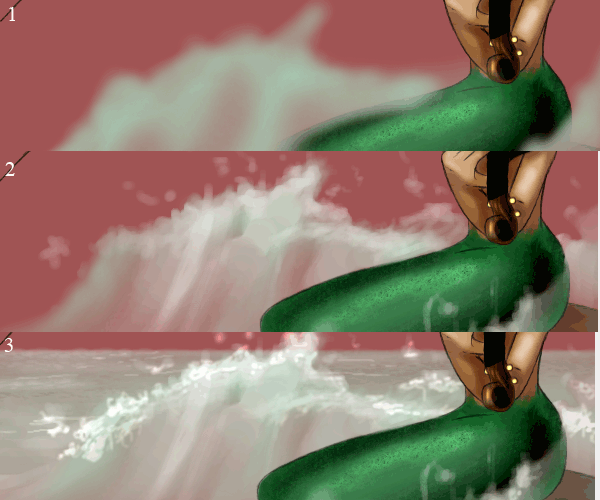 |
To paint the water, I: 1.Started by putting down the bsic shape of he wave/splashy thing with the Airbrush. 2.Went back in the the watercolor 2 Tool and put in some foamy stuff and some detail in the water. 3.Put a horizonline and used a Texture with the Airbrush tool to make far-away crests. I also used the dodge tool to highlight the water and make it look clear. |
| Step 8 | |
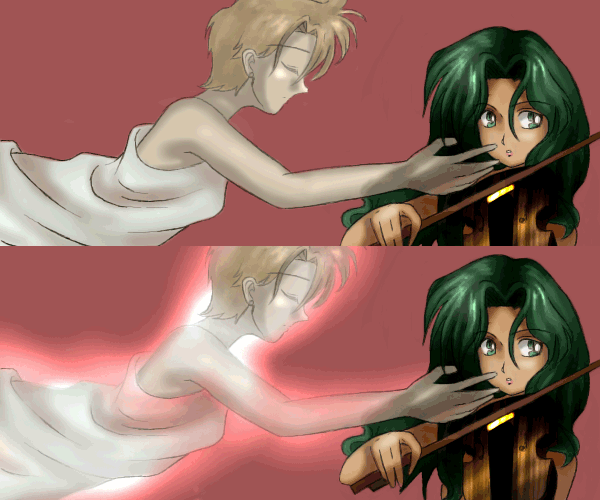 |
I painted haruka in the same fashion as I did Michiru except I made her pale and ghostly. I also made her look translucent by showing Michiru through her hand.
I even lightened up her lineart a bit gave her a glow with the Airbrush tool on a layer over the lineart layer. I dodged the BG a bit to make her look even more Glowing. |
| Step 9 | |
 |
I then added some wings on Haruka with the Airbrush and Watercolor 2 Tools, made her even more glowy too.
Then started laying in more of a BG by putting a green-ish color (like Michiru's air) over the pink. |
| Step 10 | |
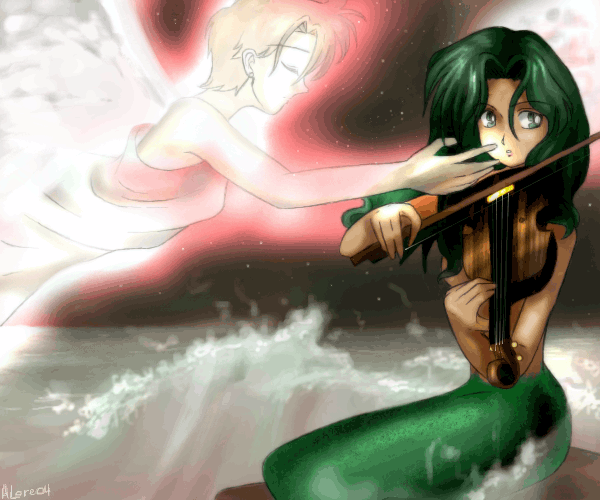 |
Some final touches were added, the stars and the moon. And the picture is Finished! Now just hit "Upload" and "Yes" and share your picture with the rest of the oekaki'ers! |
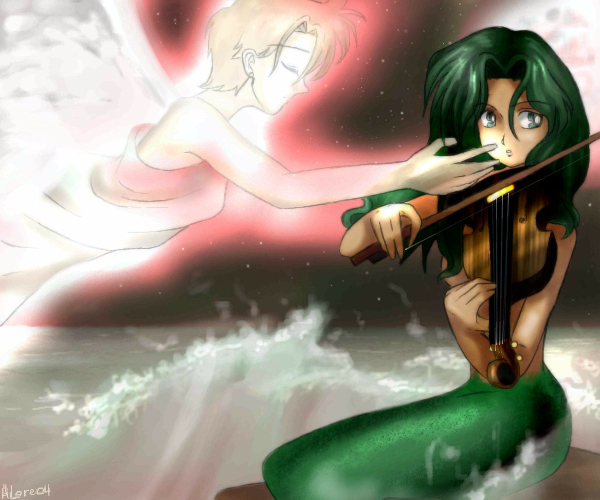
And here we have the final product uncompressed!
Tutorial is ©Amanda Lore 2004. Please do not host this tutorial on your site without asking me first. This tutorial was drawn on the oekaki boards at www.sailor-games.com