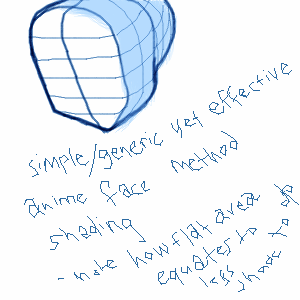
Hi anyone who may stumble upon this!
This
is a tutorial done on Oekaki Shi-Painter v1.114, equipped with
multiply/reverse layers and other functions. It totally kicks v1.107's
ass :P.
This is my first tutorialthinger so my apologies for
how chaotic it is ^^;. I'd firstly like to mention that this is not a
'how to use oekaki' tutorial and it works under the assumption you
already know how to use opacity, size, layers, colour sliders etc.
Also, the colouring style I employ generally takes at minimum an hour
an a half, so if you are not prepared to spend that much time on an
image, solely for colouring, I suggest other means of shading, like
cellshading with pencil tool and fill tool on PaintBBS.
Step 1)
So first, begin with the lineart: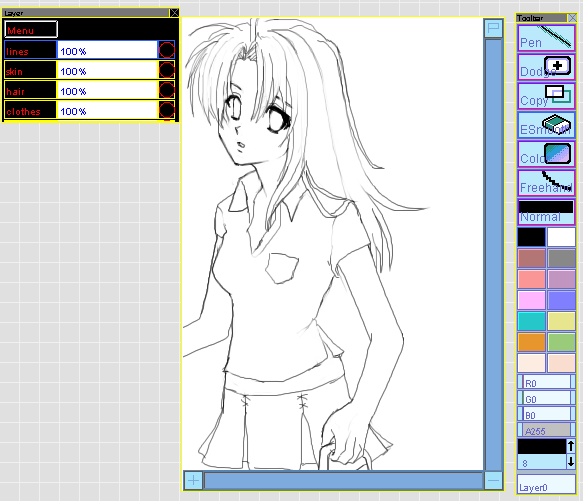
I used, for this image, lineart @ 1px on 120 opacity, and 0px on 160 opacity.
Tableters, I suggest you whip out the pressure sensitivity window and take full advantage of it.
You
can also do the presketch thing; it helps to establish a good
composition and like anatomy stuff. But since I'm lazy I didn't do one.
As
you can see on the left, there are multiple layers. One fer each
separate layer on the girl. For the type of shading I will employ, the
usage of layers is quite crucial in order to create a neat, bold
looking final product as opposed to a leaky, wimpy image.
Step 2)
Working
on the skin layer, apply a base uhh... base. Using pencil tool or pen
tool on 255 opacity. This ensures that there are no 'holes' that could
potential lead to undesirable colour leakage from lower layers. And on
a lower layer, put a background colour that suits the colour scheme of
your image and that allows for your skin colour to be seen clearly.
This way, cleaning up the protruding colours will be easier. 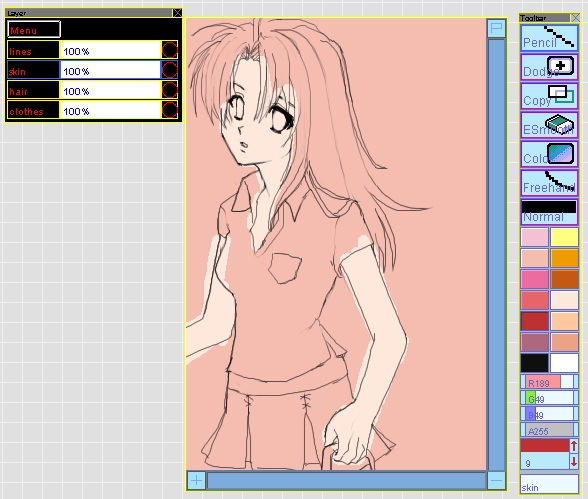
Step 3)
Open
up the colour window thing for easier selection of darker colour
shades. Move the colour location west on x-axis for more saturated
colour, and north on the y-axis for a darker hue. Set airbrush to a
high opacity, like 200 or something is my preference, and the desirable
size for the shading. 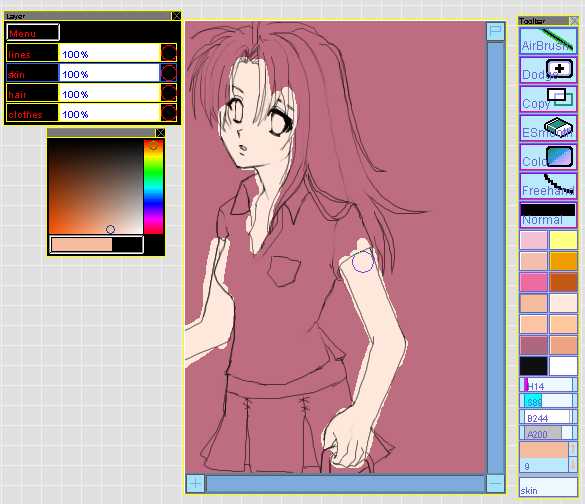
The more contrast to the lighting, the more uh.. vivid the image? Don't be afraid of contrast, it works well.
Oh yeahh, palettes are cool; use them ;D. Their colour schemes generally work out nicely.
**note:
there is a button on the side of your oekaki applet, beneath the
palette choices that reads "darken" and another that reads "lighten".
Using these is a really effective way to darker/lighter shades of
colour. However, I do not reccomend using them for skin, as it tends to
give skin this ashen appearance.
Step 4)
I start with the face just cause it's usually like the focal point. So uh this is how I start off. 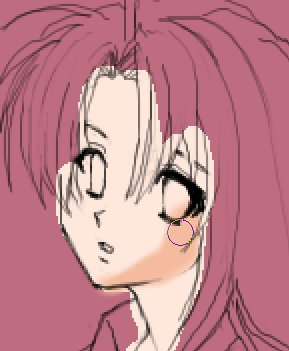

I dunno how to explain that >>;; It's like anime shading stuff; you don't have to get it, you just do it?
Step 5)
So
like um thinking realistically, there should be shading under eyebrows
(eyesockets), behind the hair (due to shadows cast by hair), under neck
(shadow cast by head), and behind the collar or.. something like that..
I'm not actually sure if, with that angle of light, there would be
shadow cast by the collar. But ah well, it works. 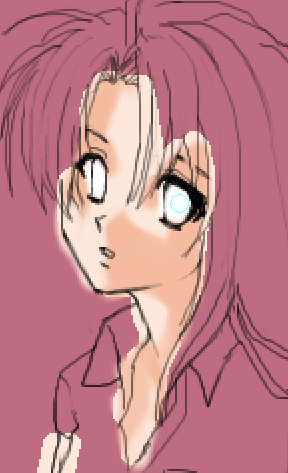
Step 6)
Do the eyes.. there's like a million trillion generic jelly anime eye tutorials out there >___<;... 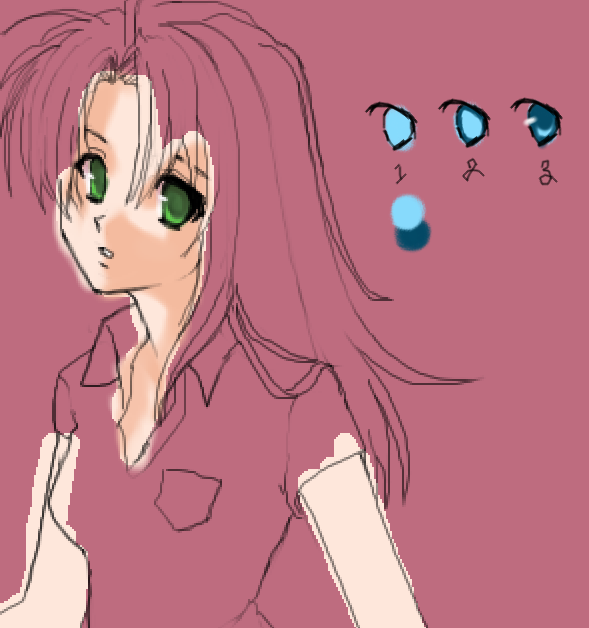
Step 7)
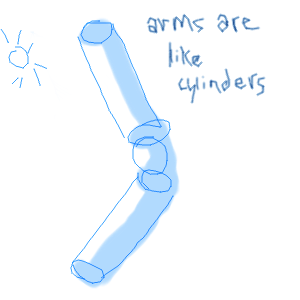
Move
on to the arms eh! But I forgot to mention that uh.. moving the brush
tool once over that base layer ain't gonna cut it. You want a BOLD
FINISHED look. So go up and down along your desired shading area a
couple or more times, till you get the UNIFORM colour. Think of arms
like cylinders; it works pretty well. 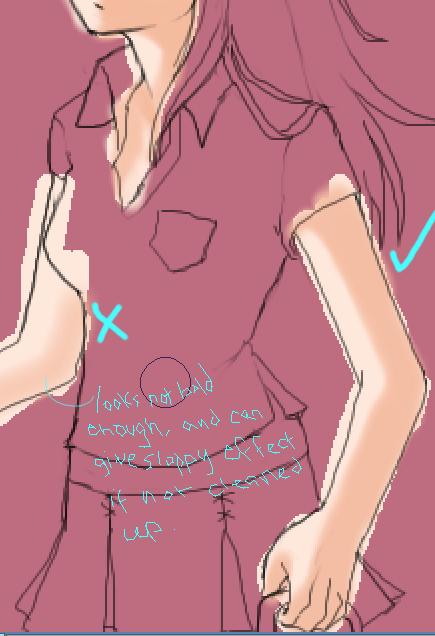
Step 8)
Add
excess shadows, like under the head on the neck area, for a more
effective shading thingy? Some people do this multiple times to create
more dramatic lighting effects. I'm to go more in depth xD. 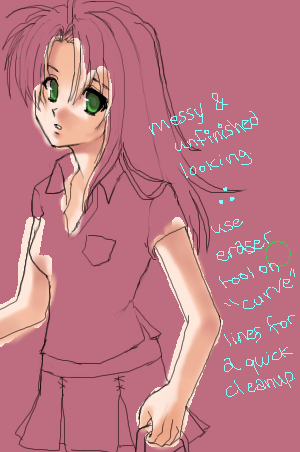
Step 9)
Clean up done using eraser tool on curve brush at 255 opacity. 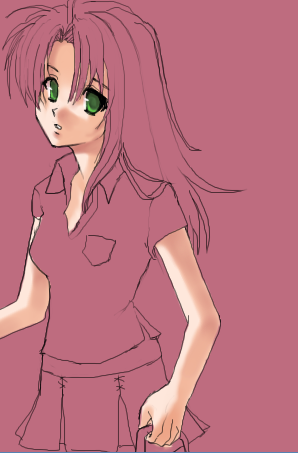
Rinse and repeat cycles for hair and clothing :).